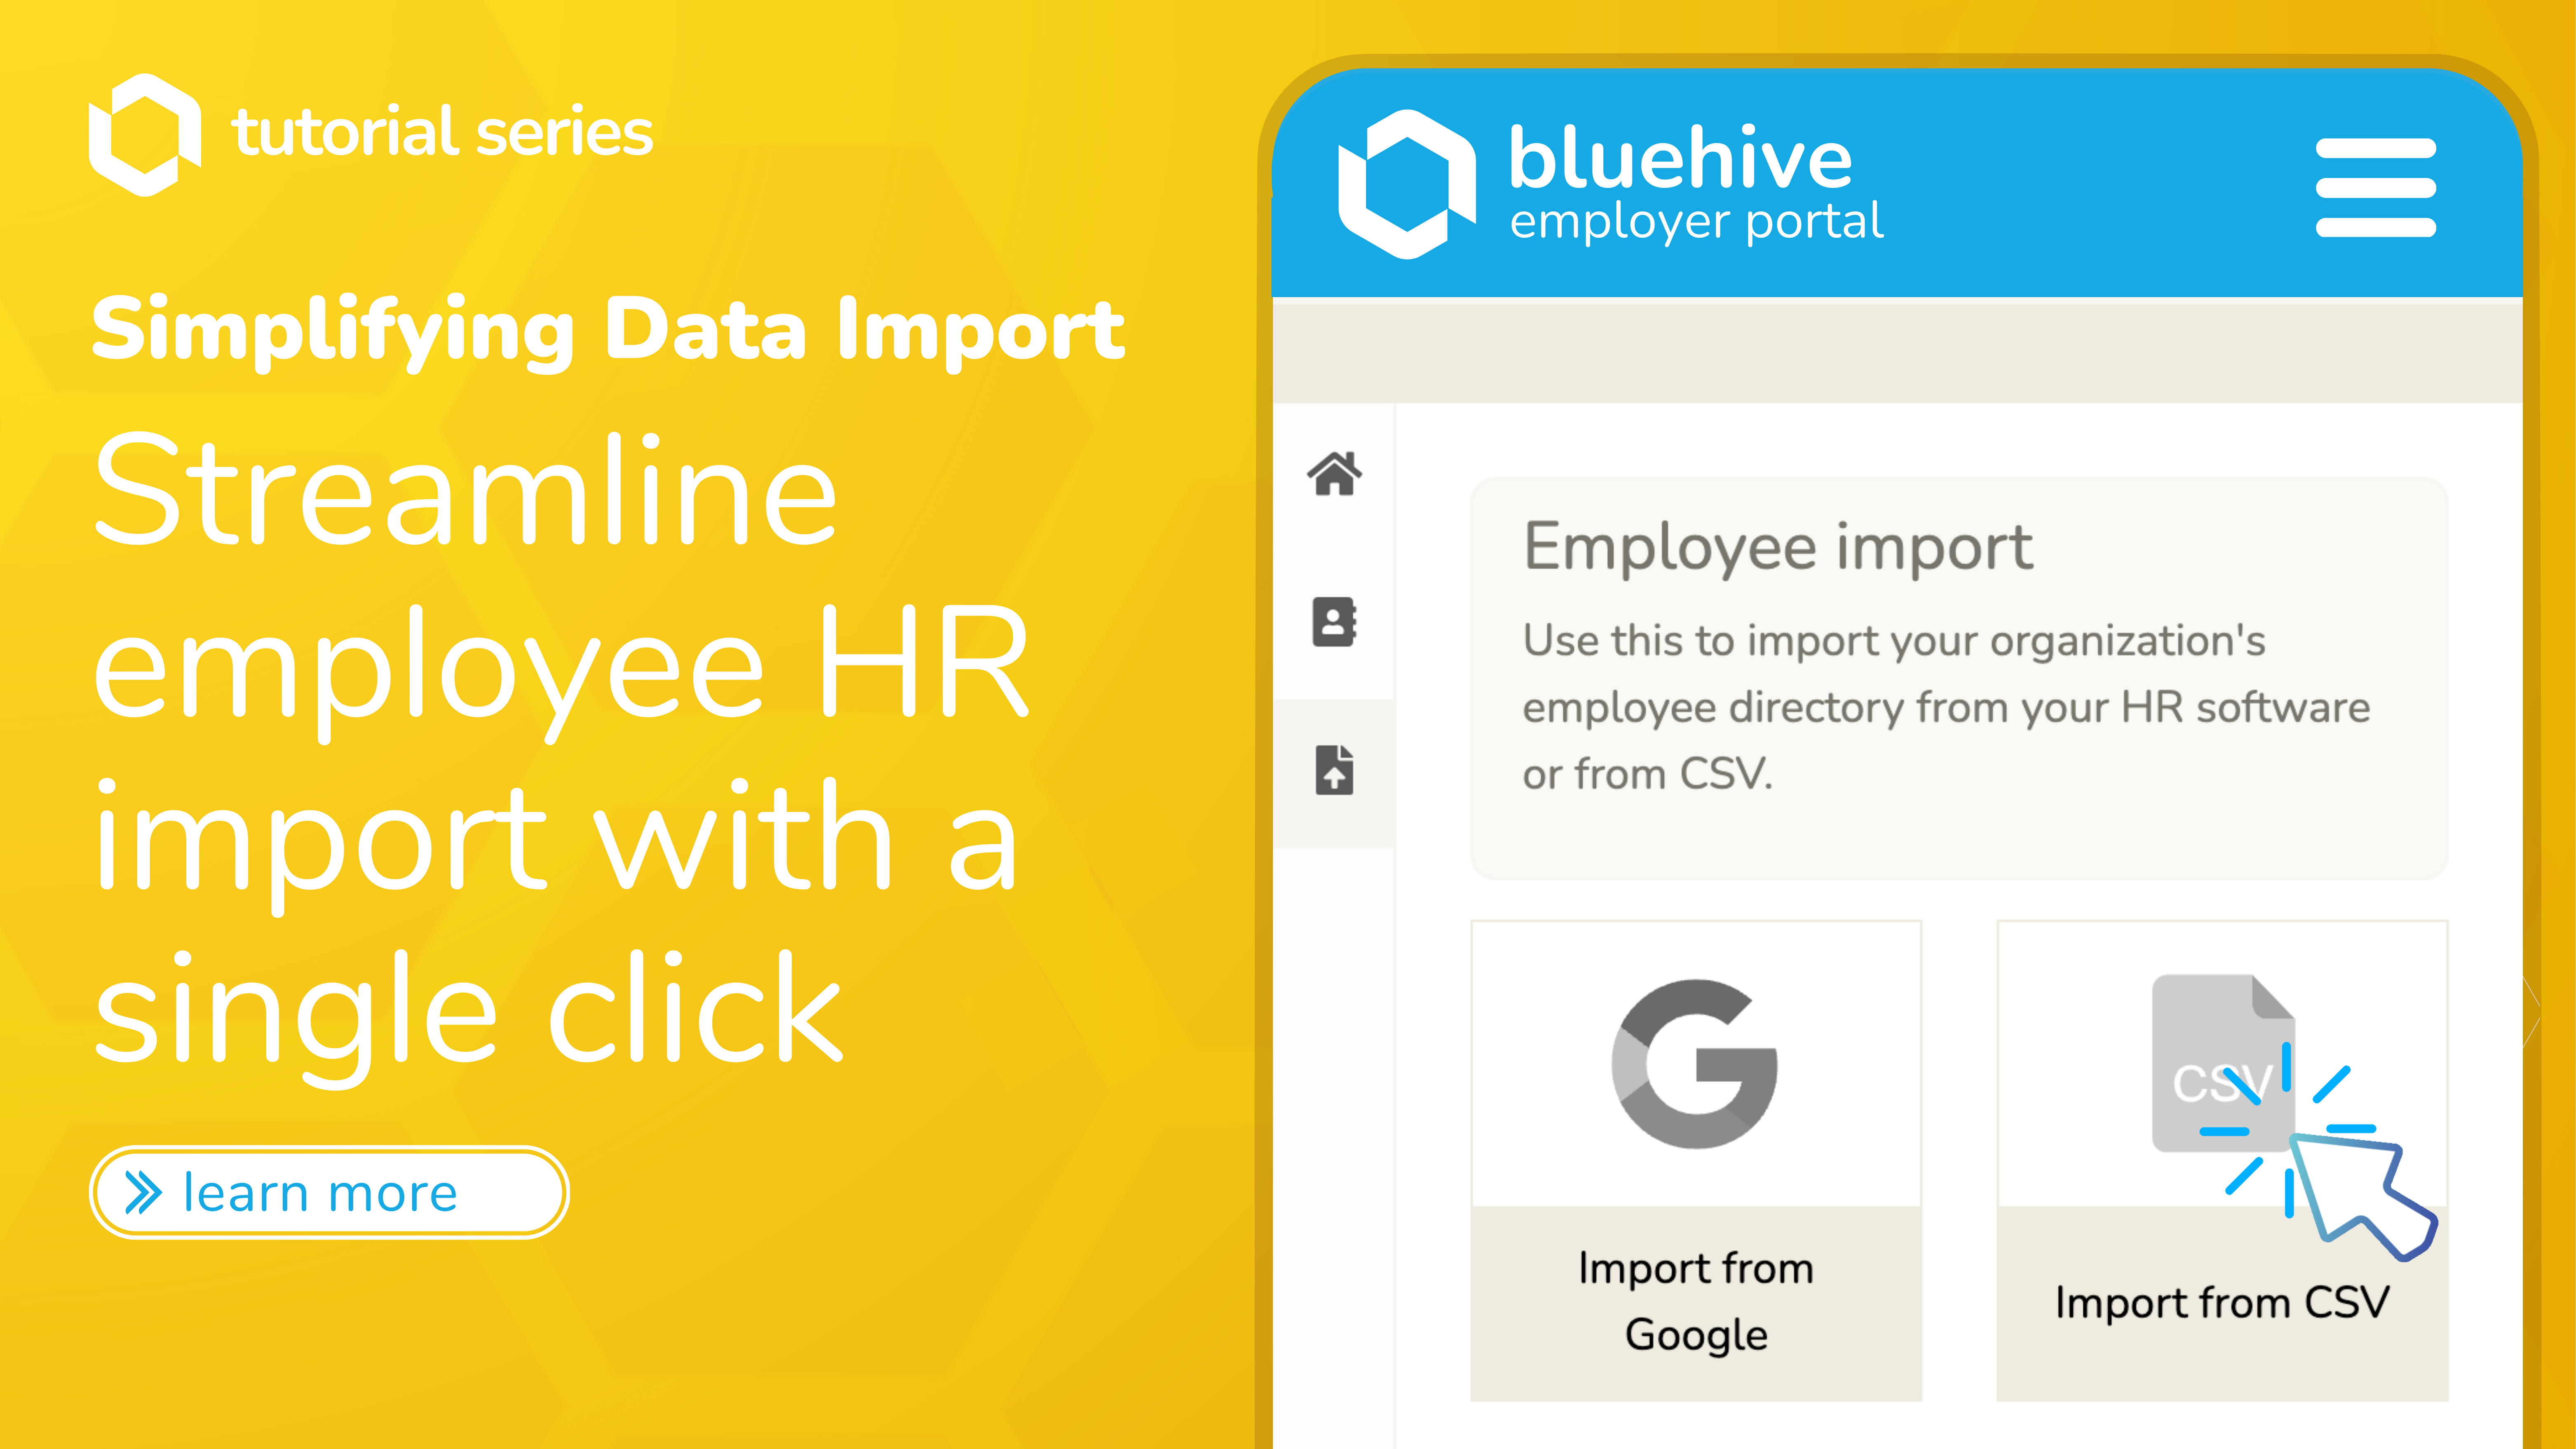
Are you tired of the manual and time-consuming process of entering employee data into your occupational health testing platform? Look no further than BlueHive’s CSV importer! With our user-friendly tool, importing employee data becomes a breeze. In this guide, we will walk you through the simple steps of using BlueHive’s CSV importer, empowering you to efficiently import and manage your employee data with ease. Say goodbye to tedious data entry and hello to a streamlined and automated process with BlueHive’s CSV importer. Let’s get started on simplifying your employee data management journey!
Step 1: Navigate to Employee Management
Begin by clicking on the “Employees” tab in your BlueHive employer portal. This will be your starting point for managing your workforce.
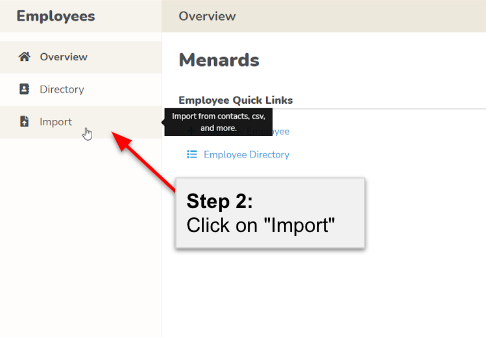
Step 2: Initiate Import
Once in the Employee section, click on “Import” to access the data import functionalities.
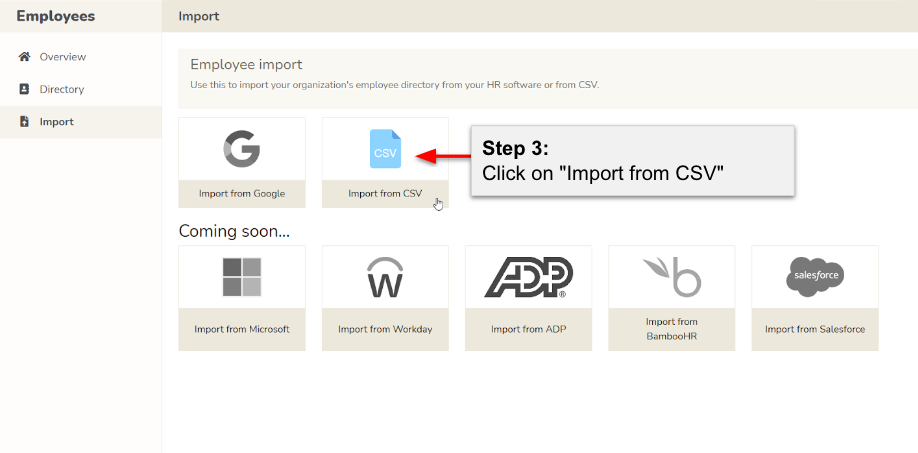
Step 3: Choose CSV Import
Within the Import options, click on “Import from CSV” to specify that you’ll be uploading employee data in CSV format.
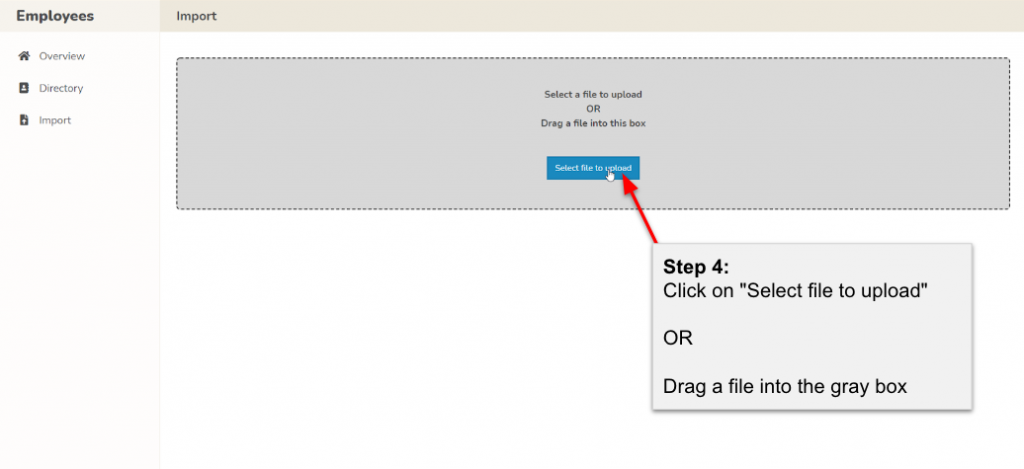
Step 4: Select Your File
Either click on “Select file to upload” or simply drag your CSV file into the gray box for a quick and hassle-free selection process.
Step 5: Data Selection
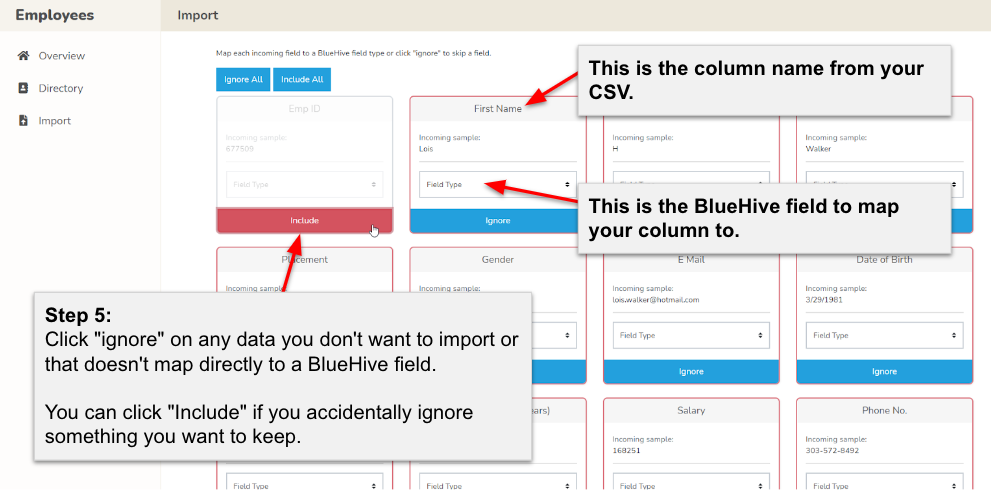
Review the incoming data in the preview window. Click “Ignore” for any data you wish to exclude from the import, or use “Include” if you accidentally omit something important.
Step 6: Map Your Fields
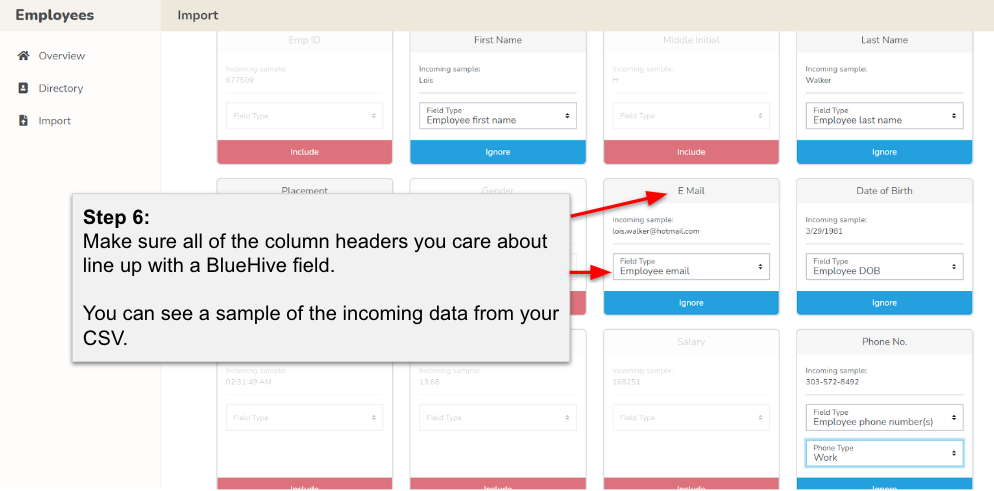
Ensure all column headers in your CSV file align with the relevant BlueHive fields. A sample of the incoming data will assist you in this mapping process.
Step 7: Confirm and Import
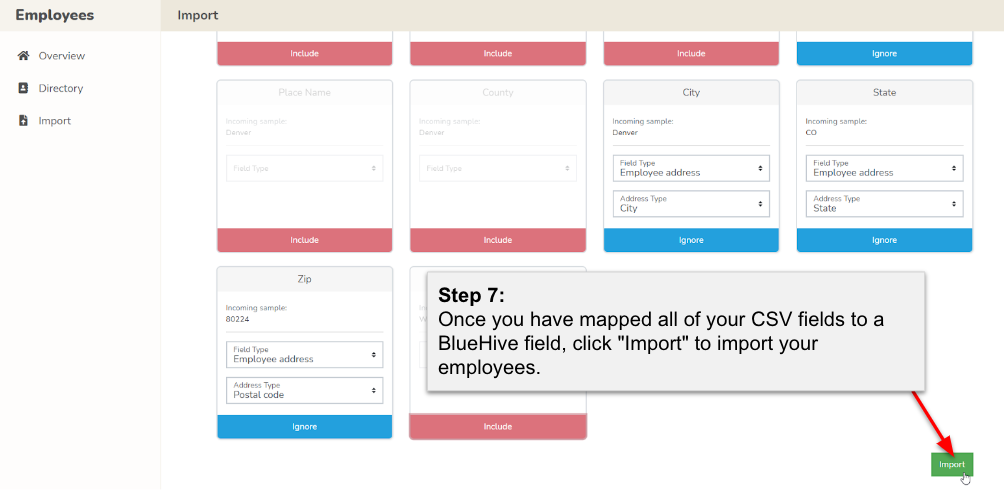
Once satisfied with your field mappings, click “Import” to initiate the seamless import of your employee data into BlueHive.
Congratulations! You’ve successfully uploaded your CSV data, streamlining your employee management on BlueHive. For more user-friendly guides and helpful features, stay tuned as we continue to enhance your BlueHive experience.

